IoT platform switching: From Conrad Connect to iobroker
Published:
In our research project Smart Air we were forced to get rid of Conrad Connect IoT platform. Why? To our annoyance they just shot it down - and announced the shut down just one month in advance! In this post I’ll describe what had to be done to migrate to the open source IoT platform iobroker and why I’m actually happy about this forced IoT platform switching.
Our Starting Point
Within the research project Smart Air we are trying to develop an AI based control of a ventilation system with integrated dehumidification for residential houses. Therefore we collected and are still collecting data of a reference house with a standard ventilation system. This data is measured by serveral sensors from Homematic IP placed in each room of the reference house as well as outside of the house. As Homematic IP was partnering with Conrad Connect we did not really question which IoT platform would be the right one for our needs and just accepted the costs for Conrad Connect (round about 1000€ per year for our project size). We built the following infrastucture:

As you can see all the data from the different sensors within the reference house is consolidated via the Homematic IP access point. From there it is sent over the internet to two Clouds: Homematic Cloud and Conrad Connect. With the Homematic Cloud the Homematic application is fed with real time data, so you can check the sensor values with your smartphone from whereever you are. But thats just for the real time data and you don’t get your data outside the application! So we were looking for a way to store the data into a database and Homematic support led as to their partner Conrad Connect. Within Conrad Connect we found a way to do an API Call to our AWS API Gateway for every sensor. This was not very convenient as for every sensor you have to do some drag & drop within Conrad Connects GUI as well as add your put call. There is no looping over the sensors and no versioning of the code which is quite a disadvantage. However, it worked out and we got our data to our familiar AWS world where we could store, process and visualize it as well as develop our AI based control of the ventilation system.
IoT platform requirements
When Conrad Connect announced their shut down I was acutally quite surprised as I just didn’t expect a subsidiary of the quite large player Conrad Electronics to fail. So I started looking for a replacing IoT platform. Having in mind that I was disappointed by a commercial player as well as my positive attitude towards open source technologies due to many touchpoints in my job as a Data Scientist, it was quite clear that I would check out open source alternatives first. So my requirements were the following:
- preferably open source
- easy communication with Homematic IP sensors / Access Point
- possibility to do scripting (not just some GUI)
- preferably Python scripting
Well I cound’t find an IoT platform that fulfilled all of the requirements above but with iobroker I found one that met all the requirements exept for the scripting language which is Javascript instead of Python. At this point I have to admit, that I did not really compare all the ups and downs of different IoT platfroms. I was rather spending some hours checking some common IoT platforms and once I found one that seemed to fulfil my requirements I just started with a technical Proof of Concept which worked out. This is basically how I ended up with iobroker and if one of you readers knows about other alternatives I would be happy if you shoot me a message via linkedin.
Migration to iobroker
In the following I will describe the migration steps I had to do in order to keep the data pipeline described above running with iobroker instead of Conrad Connect.
Step1: Get iobroker running
I got iobroker running on my Mac first in order to test it and then I installed in on a raspberry pi, which is both fairly easy as you basically just have to execute the following command within your shell:
curl -sLf https://iobroker.net/install.sh | bash
iobroker start
Now iobroker is running in the background and you just need to know the devices ip address iobroker is running on and - as long as you are within the same network - you can access it’s admin GUI in a browser via 192.168.xxx.xxx:8081.
Step2: Install necessary adapters
For my purpose I needed two adapters:
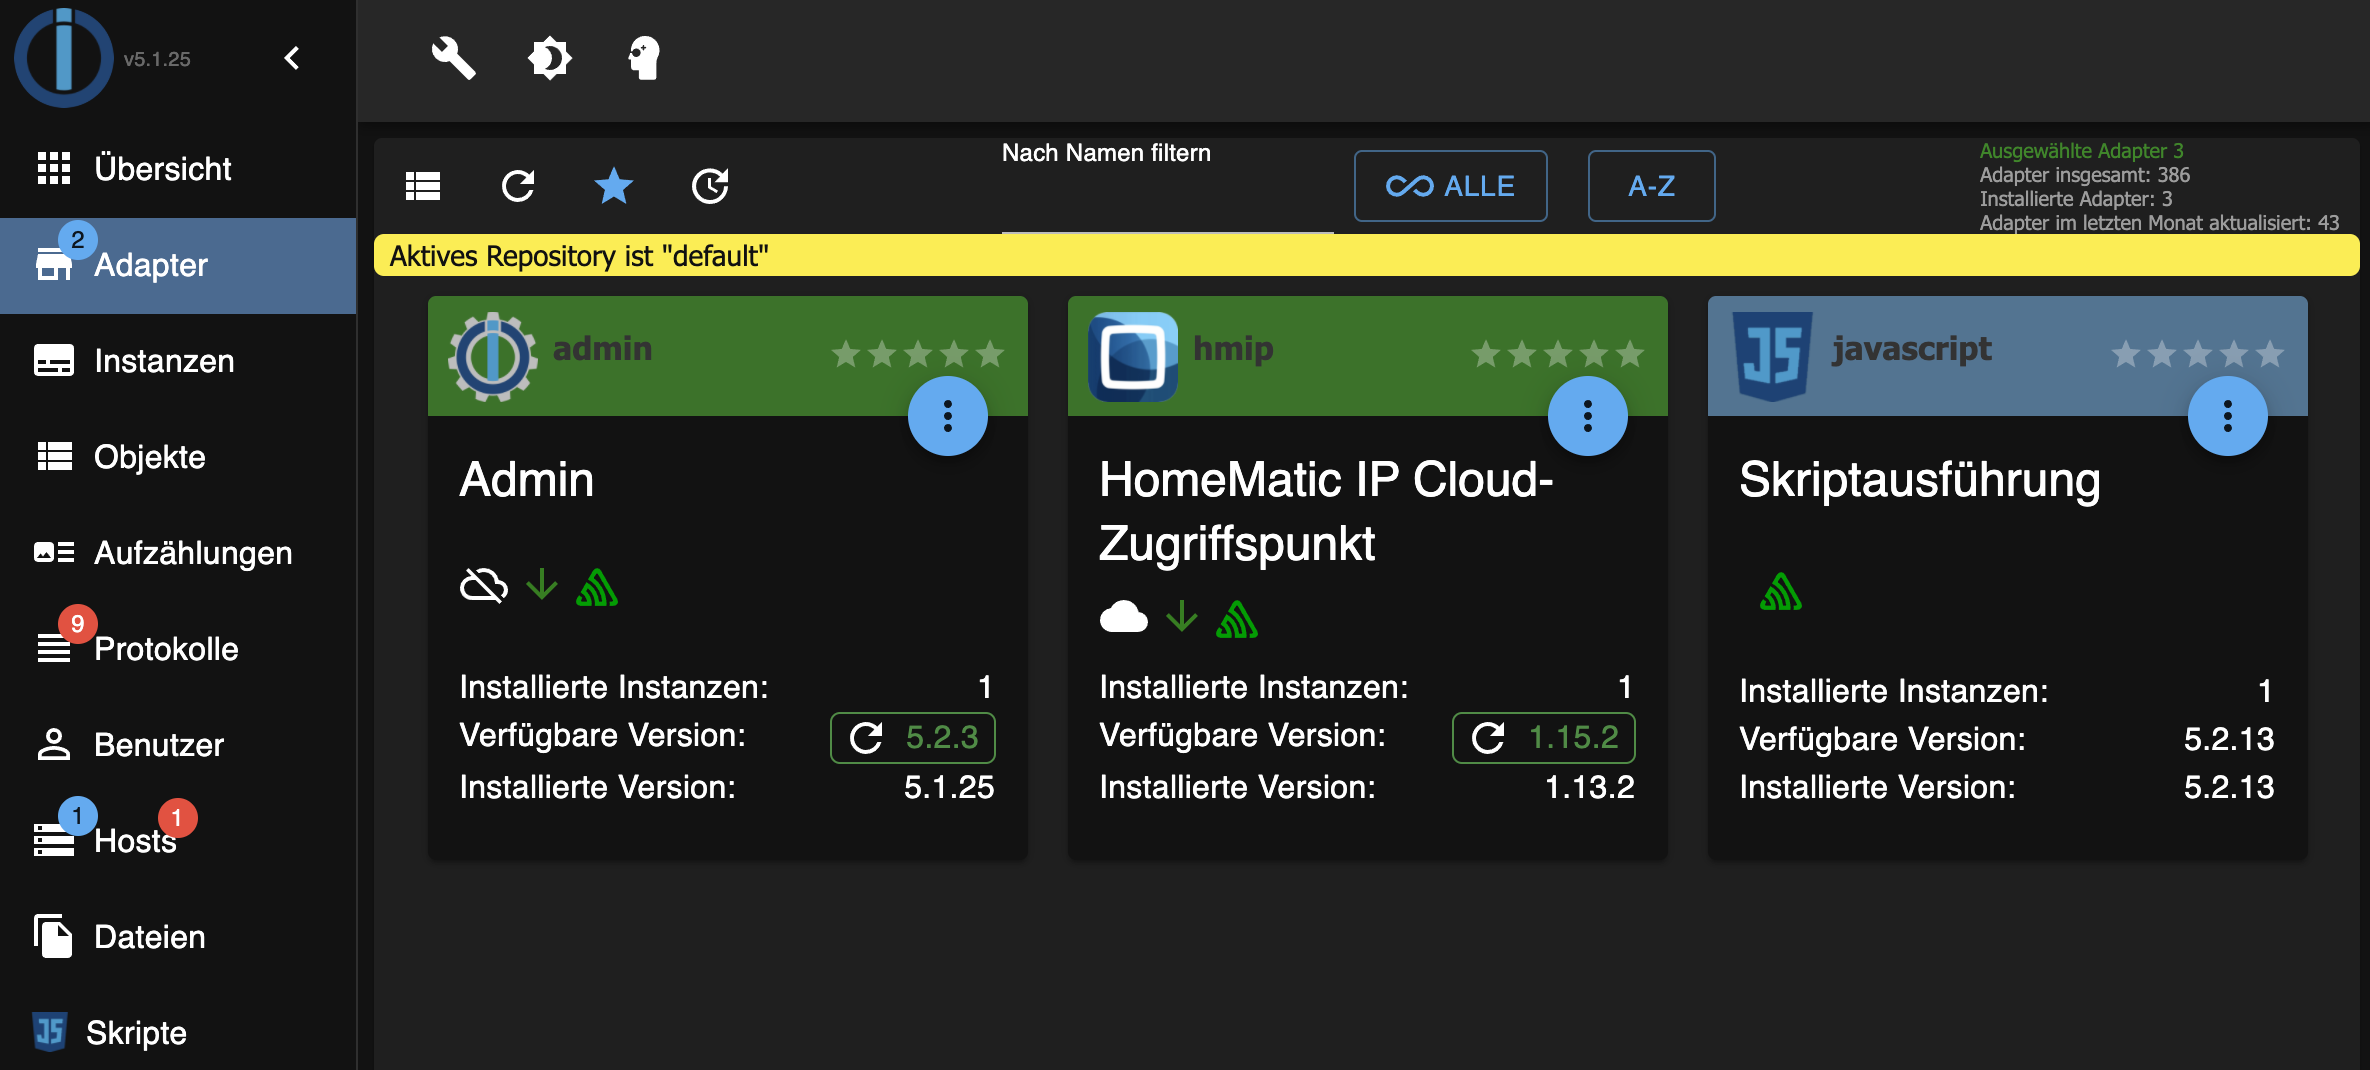
- “hmip: Homematic IP Cloud-Zugriffspunkt” in order to connect to the Homematic IP sensors in the reference house.
- “javascript: Scriptausführung” in order to run a script that sends the sensor data to the AWS API Gateway.
You can install these two adapters using your shell with the following commands:
iobroker add hmip --host <YourHostname>
iobroker add javascript --host <YourHostname>
Or you can install them using the admin GUI as can be seen here:

Step3: Connect iobroker with Homematic IP access point
Now I connected my hmip adapter with my Homematic IP access point following the adapters instructions. Therefore you have to enter your SGTIN on the back of the Access Point and the PIN (if set before), and validate the data via press of the blue LED Button. For a detailed instrction watch this video.
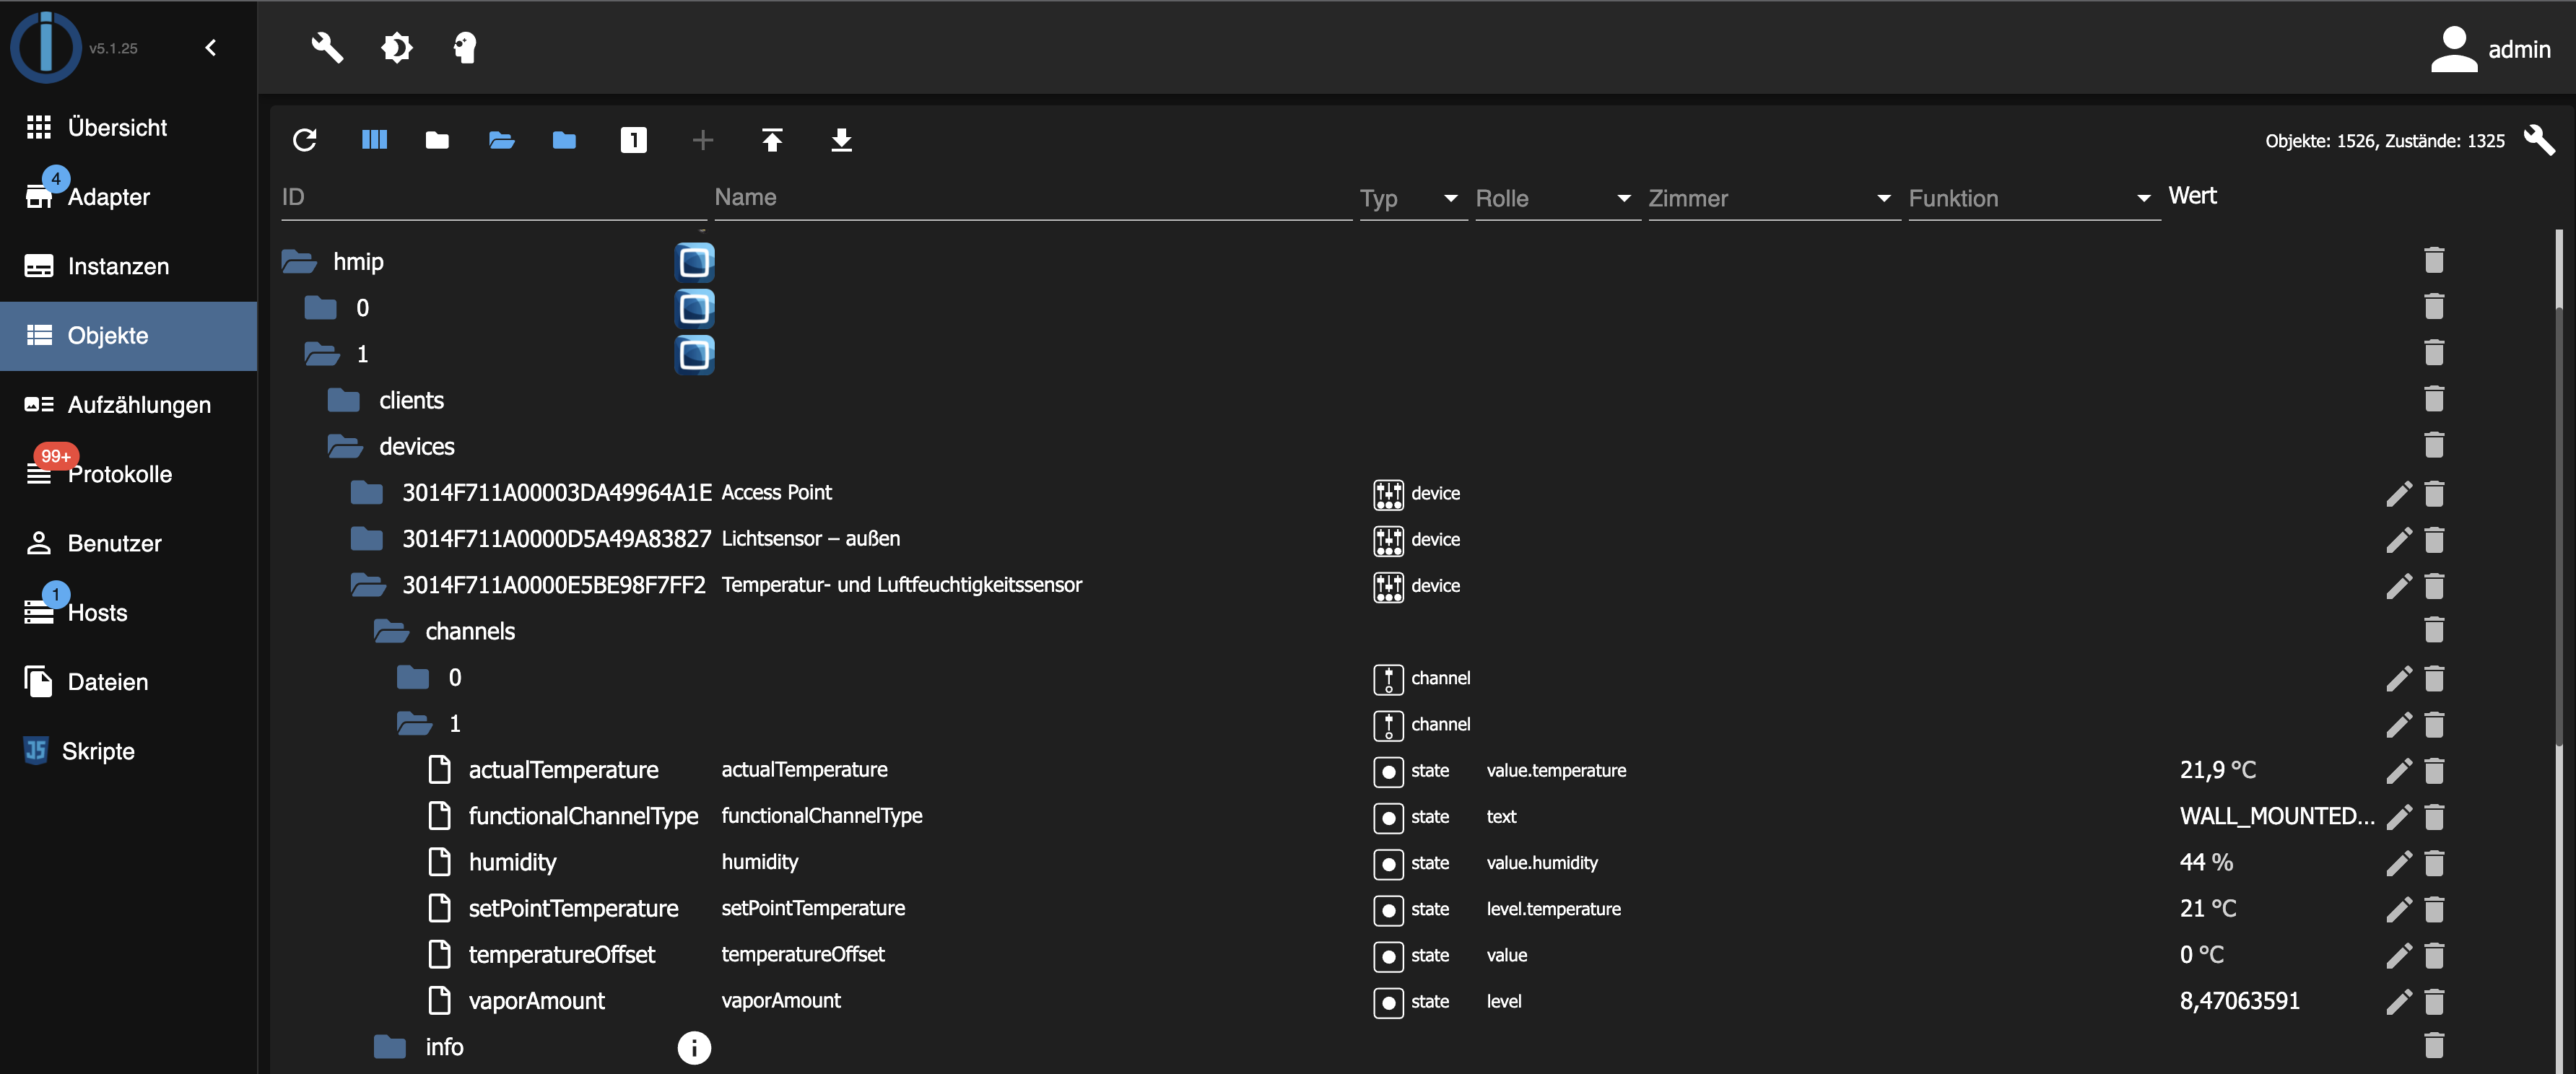
Once my Homematic IP access point was connected to iobroker I could check the sensor data via the admin GUI which I found quite useful to check out the data fields. Here you can see a snapshot of the admin GUI:

Step4: Implement the logic to send the data to the API gateway
Once the javascript adapter is installed you can add scripts that continuously run in the background and in my case send my sensor data to an API Gateway. You can basically choose between the following ways of scripting:
- rules
- blockly
- javascript
- typescript
The first two are drag & drop soulutions with graphical blocks that help non developers creating scripts. I think especially blockly is worth mentioning, as you can produce javascript code with it, which helped me at the very beginning to get the first script running.
In the following you can see some example code that reacts on changes of the temperature of one of the sensors. It collects the important information in a JSON object and sends it to a postman mock server.
var url = "https://b8b08efd-36e9-4062-9309-d9d49f42e9f9.mock.pstmn.io/post";
var XMLHttpRequest = require('xhr2');
var project = "reference_0.2";
var xhr = new XMLHttpRequest();


on({id: 'hmip.0.devices.3014F711A0000E5BE98BC878.channels.1.actualTemperature', change: "ne"}, async function (obj) {
  xhr.open("POST", url);
  xhr.setRequestHeader("Accept", "application/json");
  xhr.setRequestHeader("Content-Type", "application/json");
  xhr.onreadystatechange = function () {
   if (xhr.readyState === 4) {
      console.log(xhr.status);
      console.log(xhr.responseText);
   }};

  var date = getDateObject(obj.state.ts);
  var time = getDateObject(obj.state.ts).toString().substr(0,33);
  var value = obj.state.val;
  var data = `{
  "project":"${project}",
  "device": "kitchen_1",
  "sensor": "temperature",
  "date": "${date}",
  "time": "${time}",
  "state": "In Range",
  "parameter": "${value}"
  }`;

  exec(xhr.send(data));
});
As you can see in the code snippet, I am using this xhr2 package. It’s an npm package that implements the W3C XMLHttpRequest specification on top of the node.js APIs. Here you can find more information about this package. In order to run the code snippet above you need to install it into the location where iobroker resides.
With about 180 lines of code doing some looping and transformation I could iterate over all the sensors and weather measurements within and outside the reference house - all versionable and at no cost which is quite an advantage compared to the Conrad Connect solution we used before.
Step5: Validate my data
As I am rather a data scientist than an IoT platform expert of course I was most interested in the actual data and did not want to have any logical breaks caused by the IoT platform switching. So I was checking if there are any differences in the data that reach my API gateway if I sent it over Conrad Conect vs iobroker. Therefore I defined a time window when I sent the sensor data to both IoT plattforms. In the following graph you can see the result for one sensor. It’s an interactive graph so feel free to zoom in and check out the exact datapoints.
As you can see from December 17, 2021 at around 11:15 I sent the sensor data to both IoT plattforms. I could configure iobroker to send new data only if there is an acutal change in the sensor value. This was not possible via Conrad Connect (besides the value cange trigger there was some kind of timely trigger). So with iobroker I can get the same information content by clearly less datapoints, which saves resources or at least reduces processing steps before saving the data within a database.
Conclusion
As I mentioned at the beginning of this post I am really happy about this platform switching as there are many advantages of iobroker over Conrad Connect:
- We used the open source community verison of iobroker. So compared to Conrad Connect we save round about 1000€ a year.
- We can fully version our javascript code that does the put calls. That means there is no depenency of any GUI as with Conrad Connect.
- We have full control of the data and when to send it. By sending just the value changes we get the same information content by clearly less data traffic compared to Conrad Connect.
- We have full control of all data the sensors are collecting. With Conrad Connect we had some data fields that could not be transmitted (like illumination of our weather sensor). When we talked to Conrad Connect’s support about that, they told us we had to wait until they have implemented a maker for this sensor field on their platform what acutally never happened.
- iobroker is now running for about 3 month on a raspberry pi without a single data loss. So I am very confident with its stability even thouhg it is running on just a raspberry pi. Of course in order to asure even higher availability you can run it on highly availabile cloud resources.
What’s next:
- Reviewing my infrasturcture shown in the first graph of this blog post I realized that with this plattform switching I could also get rid of the API gateway and therefore avoid a security vulnerability. I can run iobroker on an AWS EC2 instance and directly write the data events to an eventbus. All within the same VPC.
- As I like to have everything fully automated, next I’ll try to bring the manual steps like the installation of iobroker itself and its adapters to code and add everything to terraform that we use to provision our whole AWS infrastructure. I have to admit that I am not sure yet if the authentication step between iobroker and the homematic IP access point can really be automated without any manual interaction but I am looking foreward to test it out.
If you have any questions / recommendations / comments /… regarding this blogpost just shoot me a message on LinkedIn.

Leave a Comment